Diferencia entre revisiones de «Mini-PI»
(→Raspberry-PI) |
(→Raspberry-PI) |
||
| Línea 18: | Línea 18: | ||
== Raspberry-PI == | == Raspberry-PI == | ||
| − | The main web of ''Raspberry PI'' is http://www.raspberrypi.org . The board was originally developed as an educational project, and has became very popular | + | The main web of ''Raspberry PI'' is http://www.raspberrypi.org . The board was originally developed as an educational project, and has became very popular during 2012. I recommend to read this [http://www.raspberrypi.org/about note] from the authors. |
| − | I decided to use because several reasons: | + | I decided to use it because several reasons: |
* It is cheap | * It is cheap | ||
* It is well documented | * It is well documented | ||
* It is broadly used | * It is broadly used | ||
| − | * It | + | * It has an easy hardware |
| + | * It has a GPIO bus with (IO, I2C, SPI, UART), and of course USB, ETH, ... | ||
| + | * Supports Debian Linux | ||
| − | + | So, after having used a lot of embedded kits (TI DMVA2, DM368, Hi3516, Freescale, Versalogic, DM667, ...) i found this kit really interesting for building ''low cost robotic applications''. It took me a while to find the right moment to start, but once i did it, i was surprised about how fast and easy was to set up everything. | |
I bought the Raspberry-PI here: | I bought the Raspberry-PI here: | ||
http://www.alliedelec.com/images/products/mkt/pb/rasp/rasp.aspx | http://www.alliedelec.com/images/products/mkt/pb/rasp/rasp.aspx | ||
| − | There are two models A and B. In my case i bought the B because i wanted it to have Ethernet on the board. Option A is not a bad idea, for example | + | There are two models A and B. In my case i bought the B because i wanted it to have Ethernet on the board. Option A is not a bad idea, for example if you want to have Wifi then, instead of buying the model B that has the ETH, you can buy the model-A (cheaper) and a USB-Wifi-Dongle... |
| − | http://www.raspberrypi.org/downloads | + | The first thing i did was to flash the SDcard. I followed the following links: |
| − | http://downloads.raspberrypi.org/download.php?file=/images/raspbian/2013-02-09-wheezy-raspbian/2013-02-09-wheezy-raspbian.zip | + | * http://www.raspberrypi.org/downloads |
| − | http://elinux.org/RPi_Easy_SD_Card_Setup | + | * http://downloads.raspberrypi.org/download.php?file=/images/raspbian/2013-02-09-wheezy-raspbian/2013-02-09-wheezy-raspbian.zip |
| + | * http://elinux.org/RPi_Easy_SD_Card_Setup | ||
| + | |||
| + | In my case i have used '''Whezzy''' as the distribution (the recommended for beginners), and i followed the instructions for MacOS users, and since i am a little bit old i decided to use the command line option. I didn't try the graphical tools, but i am pretty sure that they work and are as easy as the command line method. | ||
== Autores == | == Autores == | ||
Revisión del 22:34 11 may 2013
Introduction
The scope of this page is to document the Mini-PI robot.
Mini-PI stands off:
- Mini: The simplest robot: Miniskybot
- PI: Raspberry-PI: cheapest Linux PC
The intend is to build a robot, very simple, using 3D printer, and with the Raspeberry-PI as a main processor.
I will start writing here the steps i am following to do it. I have been so many years without building a robot, and now, i feel excited about it. During these years i have been following all Juan's publications, and i will take advantage of all of them: 3D printers, python, Skymega, ...
About me: I am living in California now, that is one of the reasons i am writing this in english, another, is because i would like to present this in my son's school. They knew about my background in robotics and they would like me to present something. They have a strong team in Lego Mindstorms... let's see what i can do!!
Raspberry-PI
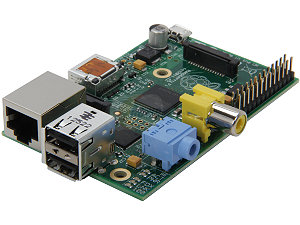
The main web of Raspberry PI is http://www.raspberrypi.org . The board was originally developed as an educational project, and has became very popular during 2012. I recommend to read this note from the authors.
I decided to use it because several reasons:
- It is cheap
- It is well documented
- It is broadly used
- It has an easy hardware
- It has a GPIO bus with (IO, I2C, SPI, UART), and of course USB, ETH, ...
- Supports Debian Linux
So, after having used a lot of embedded kits (TI DMVA2, DM368, Hi3516, Freescale, Versalogic, DM667, ...) i found this kit really interesting for building low cost robotic applications. It took me a while to find the right moment to start, but once i did it, i was surprised about how fast and easy was to set up everything.
I bought the Raspberry-PI here: http://www.alliedelec.com/images/products/mkt/pb/rasp/rasp.aspx
There are two models A and B. In my case i bought the B because i wanted it to have Ethernet on the board. Option A is not a bad idea, for example if you want to have Wifi then, instead of buying the model B that has the ETH, you can buy the model-A (cheaper) and a USB-Wifi-Dongle...
The first thing i did was to flash the SDcard. I followed the following links:
- http://www.raspberrypi.org/downloads
- http://downloads.raspberrypi.org/download.php?file=/images/raspbian/2013-02-09-wheezy-raspbian/2013-02-09-wheezy-raspbian.zip
- http://elinux.org/RPi_Easy_SD_Card_Setup
In my case i have used Whezzy as the distribution (the recommended for beginners), and i followed the instructions for MacOS users, and since i am a little bit old i decided to use the command line option. I didn't try the graphical tools, but i am pretty sure that they work and are as easy as the command line method.
Autores
Licencia
| |
Noticias
- 11/Mayo/2013: Creation of the page
